null
Trading notes for 2025-08-19
By Sean WeldonTL;DR
Executed two profitable call spreads (1DTE and 3DTE) based on a bearish bias as the market showed clear retracement signals from all-time highs back toward fair value range. Both trades capitalized on the expected pullback with solid execution.
Market Context
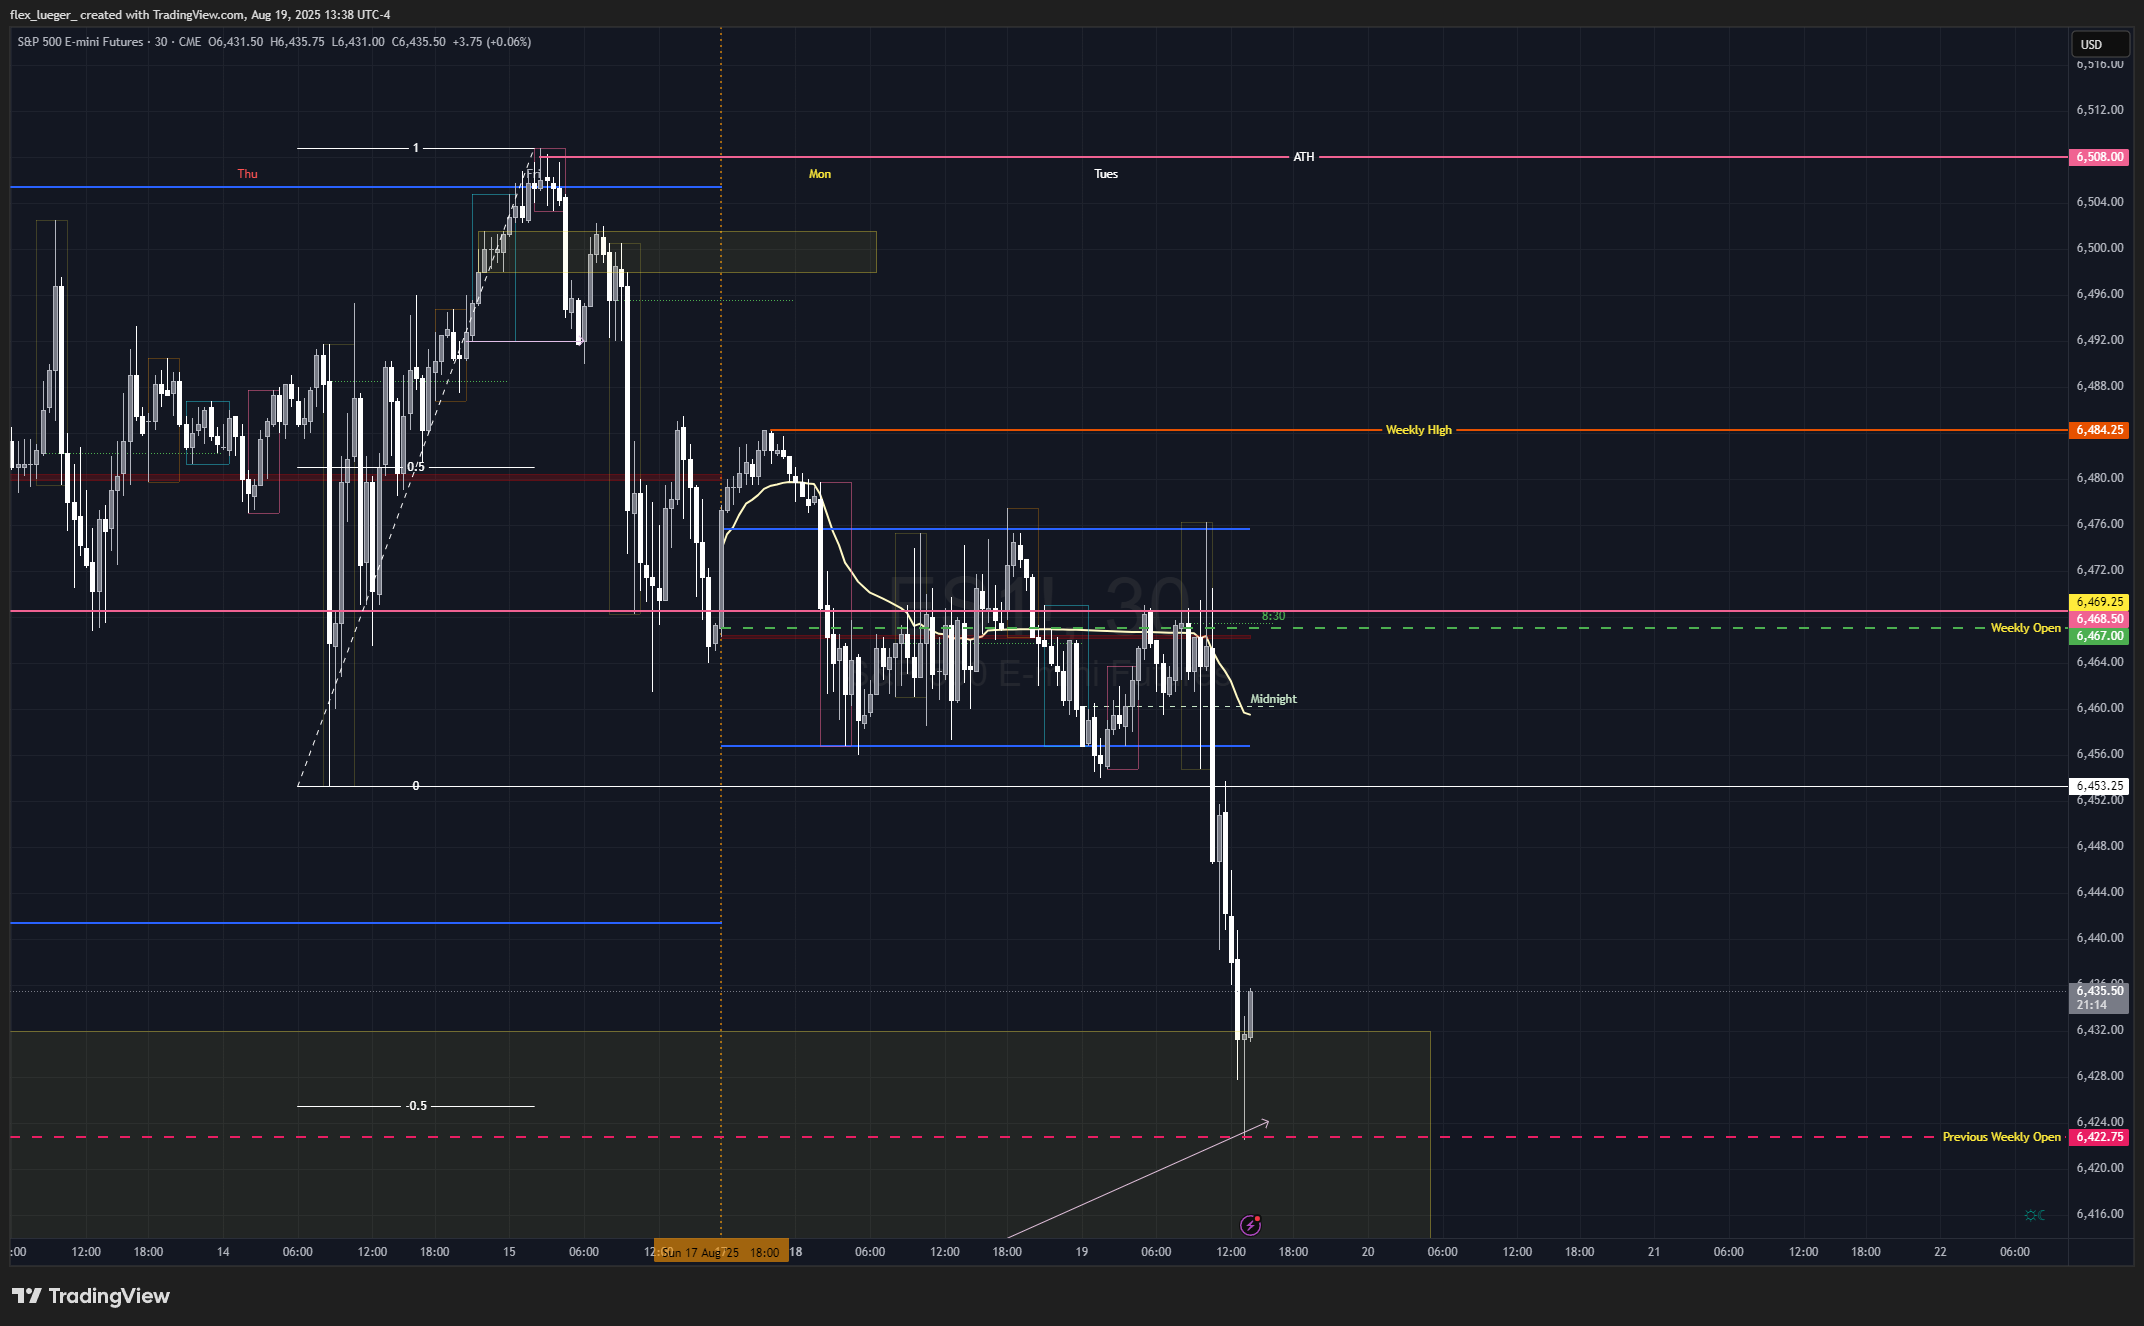
The market was displaying classic retracement behavior after hitting all-time highs. Price action was signaling a move back into fair value territory, creating an environment where a bearish bias made sense. The setup looked ripe for capturing premium on the downside move through call spread structures.
Thesis & Plan
My bearish thesis was built around the technical signals showing exhaustion at the highs and the probability of mean reversion back to fair value levels. The plan was to implement call spreads with different time horizons - one aggressive 1DTE play and one with more breathing room at 3DTE. This approach allowed me to capture the expected retracement while managing time decay risk across multiple expiration cycles.
Entries & Exits
I positioned two call spreads to capitalize on the bearish setup:
• 1DTE Call Spread - Aggressive short-term play targeting immediate retracement • 3DTE Call Spread - More conservative timeline allowing for potential choppiness before the move

The entries were timed around the technical signals showing weakness from the all-time high levels.
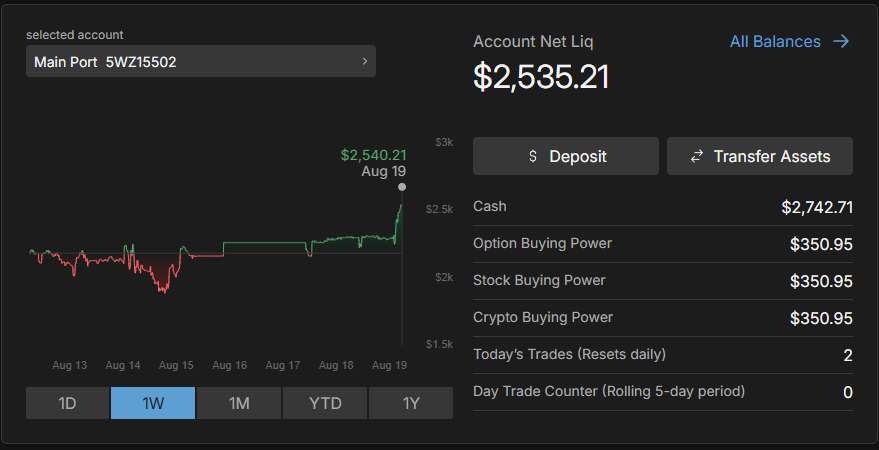
Both positions performed well as the market followed through with the expected retracement move back toward fair value.
Risk Management
Using call spreads provided natural risk definition while allowing me to express my bearish view. The 1DTE position carried higher gamma risk but offered faster profits if the thesis played out quickly. The 3DTE spread provided more time for the move to develop, reducing the impact of short-term noise while still maintaining decent theta decay.
The dual-timeframe approach helped balance the portfolio - if the move happened immediately, the 1DTE would capture it efficiently. If it took longer to develop, the 3DTE provided the necessary runway.
What Worked
The technical read was spot on - the market did indeed retrace from the all-time highs back toward fair value as anticipated. The timing of entries aligned well with the reversal signals, and both call spreads captured the downward movement effectively.
Using two different expiration dates proved to be smart risk management. It allowed me to capture the move regardless of the exact timing while maintaining appropriate position sizing across both trades.
The bearish bias was well-founded given the technical setup, and I executed the plan without getting caught up in FOMO or trying to overcomplicate the trade structure.
Lessons Learned
This trade reinforced several key principles:
• Trust technical signals - When the market shows clear retracement signals from extremes, having the conviction to act on that information pays off
• Multiple timeframes work - Using both 1DTE and 3DTE spreads provided flexibility and reduced timing risk while maintaining the core thesis
• Call spreads for bearish plays - These structures offer excellent risk-reward profiles when expecting downward moves, especially from elevated levels
• Fair value matters - Understanding where fair value sits relative to current price helps identify high-probability retracement opportunities
• Keep it simple - The setup was straightforward, the execution was clean, and the results followed. No need to overthink when the signals are clear
The success of these trades validates the importance of reading market structure correctly and having multiple ways to express the same view across different time horizons. When technical analysis aligns with market positioning and fair value considerations, it creates compelling trading opportunities that are worth acting on decisively.